Hyundai i-30: Crash Pad / Crash Pad Garnish
Hyundai i30 (PD) 2018-2025 Service Manual / Body (Interior and Exterior) / Crash Pad / Crash Pad Garnish
Components and components location
| Components Location |

| 1. Crash pad
garnish assembly [RH] |
Repair procedures
| Replacement |
|

|

| 1. |
Remove the crash lower panel.
(Refer to Crash Pad - "Crash Pad Lower Panel")
|
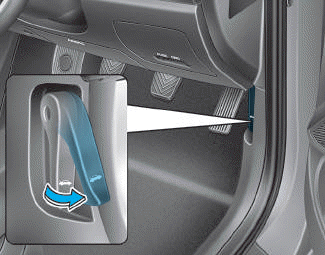
| 2. |
Using a screwdriver or remover, remove the crash pad side cover [RH]
(A).
|
| 3. |
After loosening the mounting screws, remove the crash pad garnish assembly
[RH] (A).
|
| 4. |
Disconnect the hazard switch connector (A) and start button switch connector
(B).
|
| 5. |
To install, reverse the removal procedure.
|

 Cluster Fascia Panel
Components and components location
Component Location
1. Cluster fascia
panel
Repair procedures
Replacement
•
Put on gloves to prevent hand injuries...
 Crash Pad Lower Panel
Components and components location
Component Location
1. Crash pad
lower panel
Repair procedures
Replacement
•
Put on gloves to prevent hand injuries...
Other information:
Hyundai i30 (PD) 2018-2025 Owner's Manual: Automatic climate control system
To defog inside windscreen 1. Select the desired fan speed. 2. Select the desired temperature. 3. Press the defroster button (). 4. The air-conditioning will turn on according to the detected ambient temperature, outside (fresh) air position and higher fan speed will be selected automatically...
Hyundai i30 (PD) 2018-2025 Owner's Manual: Wheel replacement, Tyre traction & maintenance
Wheel replacement When replacing the metal wheels for any reason, make sure the new wheels are equivalent to the original factory units in diameter, rim width and offset. Tyre traction Tyre traction can be reduced if you drive on worn tyres, tyres that are improperly inflated or on slippery road surfaces...
Categories
- Manuals Home
- 3rd Generation i30 Owners Manual
- 3rd Generation i30 Service Manual
- Auto door lock/unlock features
- Light bulbs
- Shift-lock system. Shift-lock release
- New on site
- Most important about car
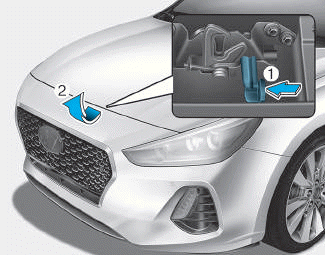
Bonnet
Opening the bonnet
1. Park the vehicle and set the parking brake.
2. Pull the release lever to unlatch the bonnet. The bonnet should pop open slightly.

Copyright © 2025 www.hi30.net