Hyundai i-30: Rear Bumper / Rear Bumper Assembly
Hyundai i30 (PD) 2018-2025 Service Manual / Body (Interior and Exterior) / Rear Bumper / Rear Bumper Assembly
Components and components location
| Component Location |

| 1. Rear bumper
assembly |
Repair procedures
| Replacement |
|
|
| 1. |
After loosening the mounting bolts, remove the rear combination lamp
(A).
|
| 2. |
Disconnect the rear combination lamp connector (A).
|
| 3. |
Loosen the mounting bolts (A).
|
| 4. |
After loosening the mounting clip, remove the rear side undercover (A).
|
| 5. |
After loosening the pin-type retainers and screws on the side of rear
bumper, detach the side part of rear bumper.
|
| 6. |
After loosening the mounting screw and clip, remove the rear bumper
assembly (A).
|
| 7. |
Disconnect the rear bumper main connector (A).
|
| 8. |
To install, reverse removal procedure.
|
 Rear Bumper beam Assembly
Components and components location
Component Location
1. Rear bumper
beam assembly
Repair procedures
Replacement
•
Put on gloves to prevent hand injuries...
Other information:
Hyundai i30 (PD) 2018-2025 Service Manual: Front View Camera Unit
Schematic diagrams Circuit Diagram Repair procedures Removal 1. Disconnect the negative (-) battery terminal. 2. Remove the front view camera cover (A) and (B). 3...
Hyundai i30 (PD) 2018-2025 Service Manual: Front Door Latch
Components and components location Component Location 1. Front door latch Repair procedures Replacement 1. Remove the plug hole (B). 2. After loosening the mounting bolt, remove the front door outside handle cover (A)...
Categories
- Manuals Home
- 3rd Generation i30 Owners Manual
- 3rd Generation i30 Service Manual
- Jump starting procedure
- EPB malfunction indicator
- Front windscreen wiper service position
- New on site
- Most important about car
Panorama sunroof
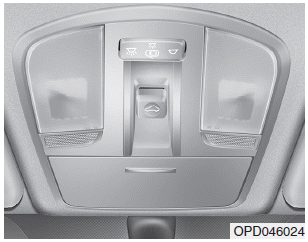
If your vehicle is equipped with a sunroof, you can slide or tilt your sunroof with the sunroof control lever located on the overhead console.

The ignition switch must be in the ON position before you can open or close the sunroof.
The sunroof can be operated for approximately 30 seconds after the ignition key is removed or turned to the ACC or LOCK(or OFF) position. However, if the front door is opened, the sunroof cannot be operated even within 30 seconds.
Copyright © 2025 www.hi30.net


