Hyundai i-30: Brake System / Brake oil
Specifications
| Specification |
| [LHD] |

|
Brake oil : DOT 3 or DOT 4
|
|
Reservoir capacity (cc) |
||
|
TOTAL |
A+B+C+D+E+F |
500 ± 20 |
|
MAX LEVEL |
A+B+C+D+E |
475 ± 20 |
|
MIN LEVEL |
B+C+D+E |
200 ± 20 |
|
ON LEVEL |
C+D+E |
170 ± 10 |
|
PARTIAL LEVEL |
D |
Pri : 53 ± 50 |
|
D |
Sec : 51 ± 5 |
|
|
CLUTCH LEVEL |
F |
26 ± 5 |
| [RHD] |

|
Reservoir capacity (cc) |
||
|
TOTAL |
A+B+C+D+E+F |
456.5 ± 20 |
|
MAX LEVEL |
A+B+C+D+E |
434.5 ± 20 |
|
MIN LEVEL |
B+C+D+E |
178 ± 20 |
|
ON LEVEL |
C+D+E |
131 ± 10 |
|
PARTIAL LEVEL |
D |
Pri : 36 ± 50 |
|
D |
Sec : 51 ± 5 |
|
|
CLUTCH LEVEL |
F |
22 ± 5 |
Repair procedures
| Replacement |
| 1. |
Disconnect the battery (-) terminal.
|
| 2. |
Remove the brake fluid level sensor connector.
|
| 3. |
Remove the reservoir cap and remove the brake fluid from the reservoir
tank using the cleaner.
|
| 4. |
Loosen the bleed screw (A) and have an assistant press the brake pedal
several times to remove any remaining brake fluid from the brake tube.
[Front]
[Rear]
|
| 5. |
Tighten the bleed screw and fill up to the 'MAX' line of the reservoir
with the brake fluid.
|
| 6. |
Connect the battery (-) terminal.
|
| 7. |
Connect the brake fluid level sensor connector.
|
| 8. |
Loosen the bleed screw (A) and have an assistant press the brake pedal
several times until the brake fluid reaches the caliper cylinder.
[Front]
[Rear]
|
| 9. |
Tighten the bleed screw.
|
| 10. |
Have an assistant press the brake pedal several times to pressurize
it and keep it pressed.
|
| 11. |
While the assistant is pressing down on the brake pedal, loosen the
bleed screw to remove air and quickly tighten it again.
[Front]
[Rear]
|
| 12. |
Repeat the above steps until all bubbles are completely removed.
|
 Brake Line
Components and components location
Components
Repair procedures
Removal
Brake Tube (Engine Room)
[LHD]
[RHD]
1...
 Brake Pedal
Components and components location
Components
1. Brake member
assembly
2. Stop lamp switch
3. Return spring
4...
Other information:
Hyundai i30 (PD) 2018-2025 Owner's Manual: Head restraint
The vehicle’s front and rear seats have adjustable head restraints. The head restraints provide comfort for passengers, but more importantly they are designed to help protect passengers from whiplash and other neck and spinal injuries during an accident, especially in a rear impact collision...
Hyundai i30 (PD) 2018-2025 Owner's Manual: Paddle shifter
The paddle shifter is functional when the shift lever is in the D (Drive) position or the manual shift mode. With the shift lever in the D position The paddle shifter will operate when the vehicle speed is more than 10km/h. Pull the [+] or [-] paddle shifter once to shift up or down one gear and the system changes from automatic mode to manual mode...
Categories
- Manuals Home
- 3rd Generation i30 Owners Manual
- 3rd Generation i30 Service Manual
- Brake/clutch fluid
- Engine coolant
- Battery replacement
- New on site
- Most important about car
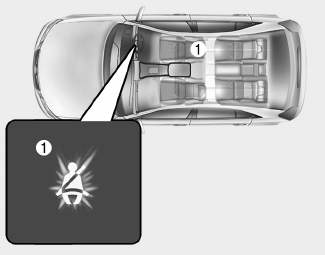
Seat belt warning light
Seat belt warning
Driver’s seat belt warning

■ Instrument cluster
As a reminder to the driver, the seat belt warning light will illuminate for approximately 6 seconds each time you turn the ignition switch ON regardless of belt fastening.
Copyright © 2025 www.hi30.net


