Hyundai i-30: Panorama sunroof / Panorama Sunroof Assembly
Repair procedures
| •
|
In order to remove panorama sunroof assembly use tools as follows.
[Tools block diagram]

① Square wire
② Insert type wire grip
[Tools assembly diagram]
|
| •
|
Tighten square wire ① inserting it in the hole of Insert type
wire grip ②

|
|
|
1. |
Remove the roof side moulding.
|
|
3. |
Remove the front glass.
|
|
4. |
Completely close the movable glass using the panorama sunroof switch.
|
|
5. |
Remove the window glass.
|
|
6. |
Loosen the bolt (A) on the side bracket of the panorama sunroof.
|
Tightening torque :
19.6 - 29.4 N.m (2.0 - 3.0 kgf.m, 14.5 - 21.7 lb-ft)
|

|
|
7. |
Loosen the panorama sunroof mounting nuts (A).
[Front]
|
Tightening torque :
9.8 - 14.7 N.m (2 - 3 kgf.m, 7.2 - 10.8 lb-ft)
|

[Rear]
|
Tightening torque :
9.8 - 14.7 N.m (2 - 3 kgf.m, 7.2 - 10.8 lb-ft)
|

|
|
8. |
Cut sealant in edge side front (A) pulling wire (B) from left to right.
|
• |
Wear gloves not to get hurt in the hand.
|
|
• |
Be careful not to be burned in the hand by too much
heat using wire.
|
|
• |
Work carefully because wire can be cut.
|
|
|
• |
Use protective tape when removing parts with screw driver
or remover not to damage the parts.
|
|
• |
Give attention not to damage body.
|
|
|
• |
More than two people should work together when using
wire.
|
|

|
|
9. |
Cut sealant between edge side front (A-A) pulling wire (B) from left
to right.
|
• |
Wear gloves not to get hurt in the hand.
|
|
• |
Be careful not to be burned in the hand by too much
heat using wire.
|
|
• |
Work carefully because wire can be cut.
|
|
|
• |
Use protective tape when removing parts with screw driver
or remover not to damage the parts.
|
|
• |
Give attention not to damage body.
|
|
|
• |
More than two people should work together when using
wire.
|
|

|
|
10. |
Cut sealant between edge side (A-A) pulling wire (B) from left to right.
|
• |
Wear gloves not to get hurt in the hand.
|
|
• |
Be careful not to be burned in the hand by too much
heat using wire.
|
|
• |
Work carefully because wire can be cut.
|
|
|
• |
Use protective tape when removing parts with screw driver
or remover not to damage the parts.
|
|
• |
Give attention not to damage body.
|
|
|
• |
More than two people should work together when using
wire.
|

|
|
|
11. |
Cut sealant between edge side rear (A-A) pulling wire (B) from left
to right.
|
• |
Wear gloves not to get hurt in the hand.
|
|
• |
Be careful not to be burned in the hand by too much
heat using wire.
|
|
• |
Work carefully because wire can be cut.
|
|
|
• |
Use protective tape when removing parts with screw driver
or remover not to damage the parts.
|
|
• |
Give attention not to damage body.
|
|
|
• |
More than two people should work together when using
wire.
|
|

|
|
12. |
After every edge side sealant is cut, remove panorama sunroof assembly
(A).
|
• |
When removal of the panorama sunroof assembly be careful
not to damage.
|
|

|
|
13. |
Use a blade to cut off residual sealant (A) around body panel.
|
• |
When cutting off the residual sealant around the body
panel, make sure to leave about the thickness of 2 mm
from the adhesive surface.
|
|
|
• |
Make sure that the body paint surface is not damaged
at all.
|
|
• |
If it is damaged, apply paint or rust inhibitor for
maintenance.
|

|
|
| •
|
In order to install panorama sunroof assembly use tools as follows.
[Tools block diagram]

① Sealant nozzle
② Adhesive sealant only for glass
③ Sealant gun
|
|
|
1. |
Use alcohol or an air gun to clean up the edges of the body panel and
the panorama sunroof.
|
|
2. |
Use a sealant gun to apply sealant (A) around body panel.
|
• |
When using a sealant gun to apply the sealant, make
sure that the sealant is not cracked to prevent water
leaks.
|
|

|
|
3. |
Carefully install panorama sunroof on body flange set by centering device
hole (A).

|
|
4. |
Check steps and gaps for every side.

|
|
5. |
Tighten panorama sunroof fixing nuts.
|
Tightening torque : 2.0 - 3.0 kgf.m
|

|
|
6. |
Install the rear window glass.
|
|
7. |
Perform water leak test.
|
• |
Avoid water flow to touch adhesive surface directly
and let water flow to side of the glass.
|
|
|
|
8. |
If water leak occurs, apply sealant on leakage spot.
|
• |
After panorama sunroof is installed vehicle should be
parked on flat place 4 hours at least.
|
|
• |
If vehicle should be run, drive slowly within 8 hours
at least.
|
|
• |
Have driver give attention to avoide violent drive or
drive ununiform road for 2 - 3 days.
|
|
|
|
9. |
Install the front glass.
|
|
10. |
Install the roof trim.
|
|
11. |
Installe the roof side moulding.
|
Repair procedures
Replacement
1.
Remove the roof trim.
(Refer to Roof Trim - "Roof Trim Assembly")
2...
Repair procedures
Removal
1.
Remove the movable glass.
(Panorama sunroof - refer "movable glass")
2...
Other information:
..
Description and operation
Description
Rail Pressure Sensor (RPS) is installed on the delivery pipe and measures the
instantaneous fuel pressure in the delivery pipe. The sensing element (Semiconductor
element) built in the sensor converts the pressure to voltage signal...
Categories
Seat belt warning
Driver’s seat belt warning
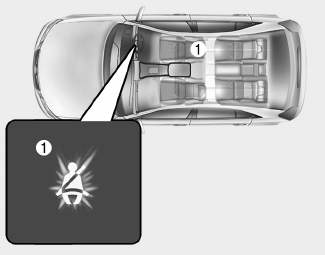
■ Instrument cluster
As a reminder to the driver, the seat
belt warning light will illuminate for
approximately 6 seconds each time
you turn the ignition switch ON
regardless of belt fastening.
read more


 Roller Blind
 Panorama Sunroof Frame Weatherstrip