Hyundai i-30: Air Conditioning System / Receiver-Drier
Repair procedures
| Replacement |
| 1. |
Remove the condenser.
|
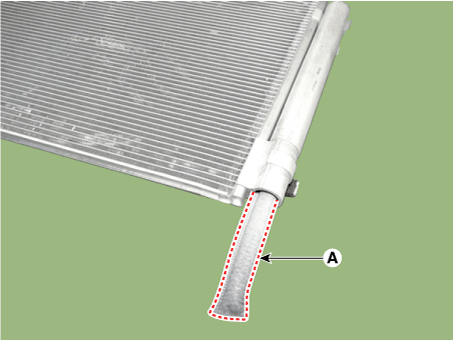
| 2. |
Remove the cap (A) on the bottom of the condenser with a L wrench.
|
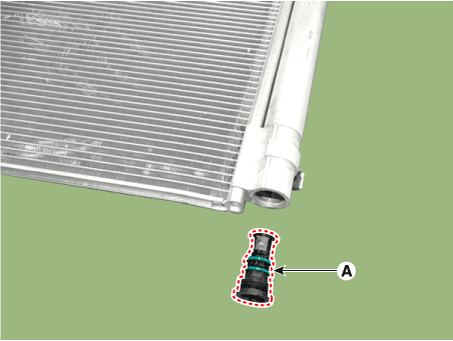
| 3. |
Remove the receiver-drier (A) from condenser using a long nose plier.
Check for crumbled receiver-drier and clogged bottom cap filter.
|
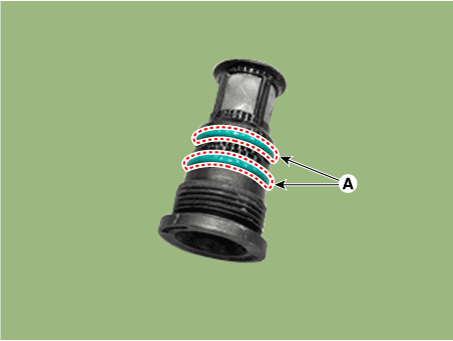
| 4. |
Apply air conditioning compressor oil along the O-rings and threads
of the new bottom cap.
|
| 5. |
Insert a new receiver-drier into the receiver drier tank. The receiver-drier
must be sealed in vacuum before it is exposed to air for use.
|
| 6. |
Install a new bottom cap to the condenser.
|

 Condenser
Components and components location
Components Location
1. Condenser
Repair procedures
Inspection
1...
 A/C Pressure Transducer
Description and operation
Description
The A/C Pressure Transducer (APT) converts the pressure value of high pressure
line into voltage value after measuring it...
Other information:
Hyundai i30 (PD) 2018-2025 Owner's Manual: Door, Bonnet, Tailgate open. Sunroof open
Door, Bonnet, Tailgate open This warning is displayed indicating which door, or bonnet, or tailgate is open. CAUTION Before driving the vehicle, you should confirm that the door/ bonnet/tailgate is fully closed. Also, check there is no door/ bonnet/tailgate open warning light or message displayed on the instrument cluster...
Hyundai i30 (PD) 2018-2025 Owner's Manual: Wheel alignment and tyre balance
The wheels on your vehicle were aligned and balanced carefully at the factory to give you the longest tyre life and best overall performance. In most cases, you will not need to have your wheels aligned again. However, if you notice unusual tyre wear or your vehicle pulling one way or the other, the alignment may need to be reset...
Categories
- Manuals Home
- 3rd Generation i30 Owners Manual
- 3rd Generation i30 Service Manual
- FCA sensor
- Scheduled maintenance services
- Trip computer
- New on site
- Most important about car
Turn signals and lane change signals
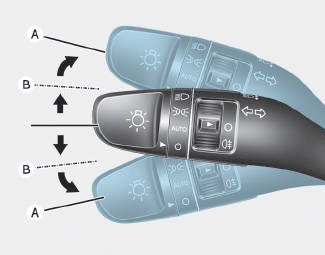
To signal a turn, push down on the lever for a left turn or up for a right turn in position (A). To signal a lane change, move the turn signal lever slightly and hold it in position (B).The lever will return to the OFF position when released or when the turn is completed.

Copyright © 2025 www.hi30.net