Hyundai i-30: ESP (Electronic Stability Program) System / Front Wheel Speed Sensor
Hyundai i30 (PD) 2018-2025 Service Manual / Brake System / ESP (Electronic Stability Program) System / Front Wheel Speed Sensor
Components and components location
| Components |

| 1. Front wheel
speed sensor |
2. Front wheel
speed sensor connector |
Repair procedures
| Removal |
| 1. |
Loosen the wheel nuts slightly.
Raise the vehicle, and make sure it is securely supported.
|
| 2. |
Remove the front wheel and tire (A) from front hub .
|
| 3. |
Loosen the mounting holt and then remove the wheel speed sensor cable
from the strut assembly.
|
| 4. |
Remove the wheel speed sensor cable braket bolt (A).
|
| 5. |
Remove the front wheel guard.
|
| 6. |
Disconnect the wheel speed sensor connector (A) and then remove it.
|
| 7. |
Loosen the bolt and then remove the wheel speed sensor (A).
|
| 8. |
To install, reverse the removal procedure.
|
| Inspection |
| 1. |
Measure the output voltage between the terminal of the wheel speed sensor
and the body ground.
|
| 2. |
Compare the change of the output voltage of the wheel speed sensor to
the normal change of the output voltage as shown below.
|
 Emergency Signal System
Description and operation
Description
Introduction of Quick Brake Warning System (ESS)
In case of quick brake by driver, the brake lamp or turn signal is blinked to
warn against the vehicle at rear...
 Rear Wheel Speed Sensor
Components and components location
Components
1. Front wheel
speed sensor
2. Front wheel
speed sensor cable
Repair procedures
Removal
1...
Other information:
Hyundai i30 (PD) 2018-2025 Service Manual: Side Impact Sensor (SIS)
Components and components location Components 1. Front Pressure Side Impact Sensor (P-SIS) 2. Front Gravity Side Impact Sensor (G-SIS) Repair procedures Removal Front Pressure Side Impact Sensor • Removal of the airbag must be performed according to the precautions/procedures described previously...
Hyundai i30 (PD) 2018-2025 Owner's Manual: Steering wheel
Electric power steering (EPS) The system assists you with steering the vehicle. If the engine is off or if the power steering system becomes inoperative, the vehicle may still be steered, but it will require increased steering effort. Also, the steering effort becomes heavier as the vehicle’s speed increases and becomes lighter as the vehicle’s speed decreases for better control of the steering wheel...
Categories
- Manuals Home
- 3rd Generation i30 Owners Manual
- 3rd Generation i30 Service Manual
- Jump starting procedure
- Auto door lock/unlock features
- Engine compartment
- New on site
- Most important about car
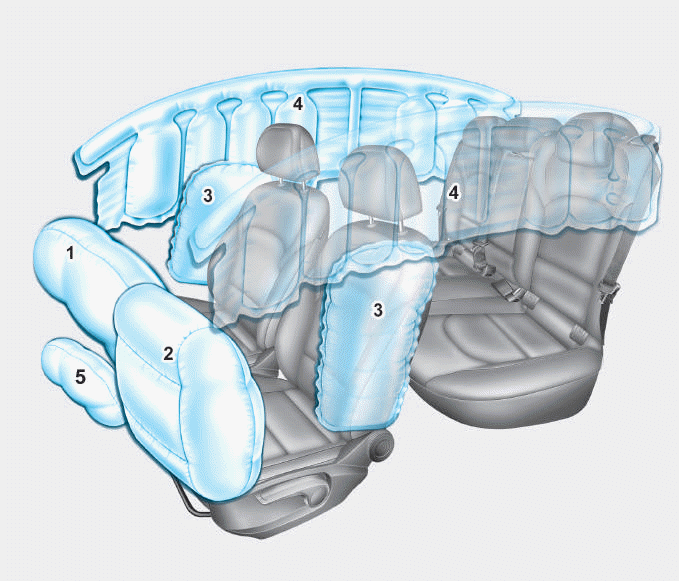
Air bag - supplemental restraint system

1. Driver’s front air bag
2. Passenger’s front air bag
3. Side air bag*
4. Curtain air bag*
5. Knee air bag*
6. Front passenger air bag ON/OFF
switch
Copyright © 2025 www.hi30.net


