Hyundai i-30: Front Suspension System / Front Strut Assembly
Hyundai i30 (PD) 2018-2025 Service Manual / Suspension System (NON-ECS) / Front Suspension System / Front Strut Assembly
Components and components location
| Components |

| 1. Strut assembly 2. Lock nut 3. Insulator 4. Strut bearing & Spring upper pad |
5. Bumper rubber 6. Dust cover 7. Coli spring 8. Spring lower pad |
Repair procedures
| Removal |
| 1. |
Loosen the wheel nuts slightly.
Raise the vehicle, and make sure it is securely supported.
|
| 2. |
Remove the front wheel and tire (A) from the front hub.
|
| 3. |
Loosen the mounting holt and then remove the brake hose from the strut
assembly.
|
| 4. |
Loosen the mounting holt and then remove the wheel speed sensor cable
from the strut assembly.
|
| 5. |
Disconnect the stabilizer link with the front strut assembly after loosening
the nut (A).
|
| 6. |
Remove the cowl top cover.
(Refer to Body - "Cowl Top Cover")
|
| 7. |
Loosen the upper strut mounting nut (A).
|
| 8. |
Disconnect the front strut assembly (A) with the front axle (B) by loosening
the bolts & nuts.
|
| 9. |
To install, reverse the removal procedure.
|
| Disassembly |
|
| 1. |
Using spring comperssor, compress the coil spring (A)
|
| 2. |
Using the special tool (09546-3X100), remove the self locking nut.
|
| 3. |
Disassembly the strut assembly
|
| Inspection |
| 1. |
Check the strut bearing for wear and damage.
|
| 2. |
Check the spring upper and lower pad for damage and deterioration.
|
| 3. |
Compress and extend the piston rod (A) and check that there is no abnormal
resistance or unusual sound during operation.
|
| Disposal |
| 1. |
Fully extend the piston rod.
|
| 2. |
Drill a hole on the (A) section to remove gas from the cylinder.
|
| Reassembly |
| 1. |
To reassembly, reverse the disassembly procedure.
|
| 2. |
Using the spring compressor,compress the coil spring (A).
|
| 3. |
Using the special tool (09546-3X100), install the self locking nut.
|
 Components and components location
Components Location
1. Front strut
assembly
2. Drive shaft
3. Steering gearbox
4. Lower arm
5. Sub frame
6...
 Front Lower Arm
Repair procedures
Removal
1.
Loosen the wheel nuts slightly.
Raise the vehicle, and make sure it is securely supported...
Other information:
Hyundai i30 (PD) 2018-2025 Owner's Manual: Tyre pressure monitoring system
WARNING Over-inflation or under-inflation can reduce tyre life, adversely affect vehicle handling, and lead to sudden tyre failure that may cause loss of vehicle control resulting in an accident. Each tyre, including the spare (if provided), should be checked monthly when cold and inflated to the inflation pressure recommended by the vehicle manufacturer on the vehicle placard or tyre inflation pressure label...
Hyundai i30 (PD) 2018-2025 Owner's Manual: Light bulbs
Consult a HYUNDAI authorised repairer to replace most vehicle light bulbs. It is difficult to replace vehicle light bulbs because other parts of the vehicle must be removed before you can get to the bulb. This is especially true for removing the headlamp assembly to get to the bulb(s)...
Categories
- Manuals Home
- 3rd Generation i30 Owners Manual
- 3rd Generation i30 Service Manual
- Auto door lock/unlock features
- FCA sensor
- Theft-alarm system
- New on site
- Most important about car
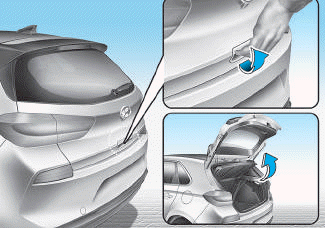
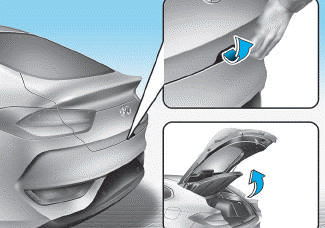
Tailgate
Opening the tailgate

■ 5 Door, Wagon

■ Fastback
Copyright © 2025 www.hi30.net


