Hyundai i-30: Fuel Delivery System / Delivery Pipe
Repair procedures
| •
|
In case of removing the high pressure fuel pump, high pressure
fuel pipe, delivery pipe, and injector, there may be injury
caused by leakage of the high pressure fuel. So don’t do any
repair work right after engine stops.
|
|
|
1. |
Turn the ignition switch OFF and disconnect the battery (-) terminal.
|
|
2. |
Release the residual pressure in fuel line.
(Refer to Fuel Delivery System - "Release Residual Pressure in Fuel
Line")
|
|
3. |
Remove the intake manifold.
(Refer to Engine Mechanical System - "Intake Manifold")
|
|
4. |
Remove the injector & delivery pipe form (A).

|
|
5. |
Remove the high pressure fuel pipe (A).
|
Tightening Torque :
Mounting bolt : 9.8 - 11.8 N.m (1.0 - 1.2 kgf.m, 7.2 - 8.7 lb-ft)
Flange nut : 29.4 - 35.3 N.m (3.0 - 3.6 kgf.m, 21.7 - 26.0 lb-ft)
|


|
|
6. |
Remove the alternator.
(Refer to Enigine Electrical System - "Alternator")
|
|
7. |
Remove the delivery pipe & injector assembly (A).
|
Tightening Torque :
19.6 - 24.5 N.m (2.0 - 2.5 kgf.m, 14.5 - 18.1 lb-ft)
|

|
|
8. |
Disconnect the wiring connector and then separate the injector (A) from
the delivery pipe (B).

|
| •
|
Do not reuse injector fixing clip.
|
| •
|
Do not reuse the injector rubber washer.
|
| •
|
Do not reuse the combustion seal.
|
| •
|
Install the component to the specified torques.
|
| •
|
Note that internal damage may occur when the component is dropped.
In this case, use it after inspecting.
|
| •
|
Apply engine oil to the injector O-ring.
|
| •
|
Do not reuse injector O-ring.
|
| •
|
When inserting the injector, be careful not to damage the injector
tip.
|
|
|
1. |
Install in the reverse order of removal.
|
Repair procedures
Removal
1.
Turn the ignition switch OFF and disconnect the negative (-) battery
cable.
2...
Specifications
Specification
Items
Specification
High Pressure Fuel Line
bar
20 - 350
MPa
2 - 35
kgf/cm²
20...
Other information:
Release Residual Pressure
in Fuel Line
•
There may be some residual pressure even after "Release residual
pressure in fuel line" work, so cover the hose connection with
a shop towel to prevent residual fuel from spilling out before
disconnecting any fuel connection...
The LKA system may operate prematurely
even if the vehicle does not
depart from the intended lane, OR,
the LKA system may not warn you if
the vehicle leaves the intended lane
under the following circumstances:
When the lane and road conditions
are poor
It is difficult to distinguish the lane
marking from the road surface or
the lane marking is faded or not
clearly marked...
Categories

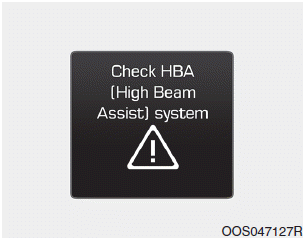
When the High Beam Assist (HBA)
System is not working properly, the
warning message will come on for a
few second. After the message disappears,
the master warning light ( )
will illuminate.
read more
 Accelerator Pedal
 High Pressure Fuel Pump
 )
will illuminate.


