Hyundai i-30: Cooling System / Coolant
Repair procedures
| Replacement and Air Bleeding |
|

|

If Diagnostic Tool is available, change the coolant and drain air according
to the descriptions below.
| 1. |
Make sure the engine and radiator are cool to the touch.
|
| 2. |
Remove the coolant reservoir tank cap (A).
|
| 3. |
Remove the engine room under cover.
(Refer to Engine and Transaxle Assembly - "Engine Room Under Cover")
|
| 4. |
Loosen the drain plug (A), and drain the coolant.
|
| 5. |
Tighten the radiator drain plug securely after draining the coolant.
|
| 6. |
Clean the coolant reservoir tank after drain the coolant.
|
| 7. |
IG Key OFF, Fill with fluid mixture of coolant and water (45 - 60%)
slowly through the coolant reservoir tank cap.
|
| 8. |
Connect the diagnostic tool and then Key 'IG ON'.
|
| 9. |
Use the diagnostic tool to activate the "integrated thermal management
module (ITM) coolant refilling mode".
|
| 10. |
Complete the ITM coolant refilling mode according to the procedure of
the diagnostic tool.
|
| 11. |
Fill with fluid mixture of coolant and water (45 - 60%) slowly through
the coolant reservoir tank cap.
|
| 12. |
Key-off and then disconnect the diagnostic tool.
|

| 13. |
Install the coolant reservoir tank cap (A).
|
| 14. |
Check the coolant quantity after driving the vehicle.
|
| 15. |
If the coolant is insufficient, replenish it.
|
| 16. |
Install the engineroom under cover.
(Refer to Engine and Transaxle Assembly - "Engine Room Under Cover")
|
If Diagnostic Tool is not available, replace the coolant and drain air according
to the descriptions below.
| 1. |
Make sure the engine and radiator are cool to the touch.
|
| 2. |
Remove the coolant reservoir tank cap (A).
|
| 3. |
Remove the engine room under cover.
(Refer to Engine and Transaxle Assembly - "Engine Room Under Cover")
|
| 4. |
Loosen the drain plug (A), and drain the coolant.
|
| 5. |
Tighten the radiator drain plug securely after draining the coolant.
|
| 6. |
Clean the coolant reservoir tank after drain the coolant.
|
| 7. |
Key-off and then disconnect the integrated thermal management module
(ITM) connector (A).
|
| 8. |
Fill with fluid mixture of coolant and water (45 - 60%) slowly through
the coolant reservoir tank cap.
|
| 9. |
After starting the engine, refill the coolant for 20 minutes used by
coolant reservoir tank.
|
| 10. |
After shut engine off and connect the integrated thermal management
module (ITM) connector (A).
|
| 11. |
After starting the engine for 5 seconds, turn off the engine.
|
| 12. |
Install the coolant reservoir tank cap (A).
|
| 13. |
Check the coolant quantity after driving the vehicle.
|
| 14. |
If the coolant is insufficient, replenish it.
|
| 15. |
Install the engineroom under cover.
(Refer to Engine and Transaxle Assembly - "Engine Room Under Cover")
|

 Cooling Fan
Components and components location
Components
1. Cooling fan
2. Fan motor
3. Cooling fan
shroud
4. Cooling fan controller (PWM)
Repair procedures
Removal and installation
Cooling Fan
1...
Other information:
Hyundai i30 (PD) 2018-2025 Service Manual: General safety information and caution
Instructions (R-134a) When Handling Refrigerant 1. R-134a liquid refrigerant is highly volatile. A drop on the skin of your hand could result in localized frostbite. When handling the refrigerant, be sure to wear gloves...
Hyundai i30 (PD) 2018-2025 Service Manual: Rain Sensor
Components and components location Components and Components Location Schematic diagrams Circuit Diagram Description and operation Description Integrated Rain Sensor Integrated rain sensor (A) controls three systems: front wiper, auto-light, and central air conditioner...
Categories
- Manuals Home
- 3rd Generation i30 Owners Manual
- 3rd Generation i30 Service Manual
- Auto door lock/unlock features
- Exhaust System (DPF) Warning Light. Glow Indicator Light
- To activate the ISG system
- New on site
- Most important about car
Warning light and message
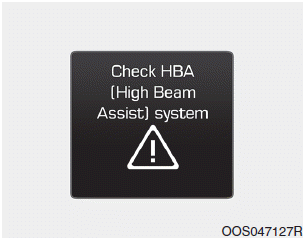
When the High Beam Assist (HBA)
System is not working properly, the
warning message will come on for a
few second. After the message disappears,
the master warning light ( )
will illuminate.
)
will illuminate.

Copyright © 2025 www.hi30.net